INTRODUCTION
I’ve always wanted to make a movable robot so when I came across the Ring:bit car kit, I had to get it. I couldn’t wait to build something that could move on its own. (SPOILER: IT WAS A LOT OF FUN!)
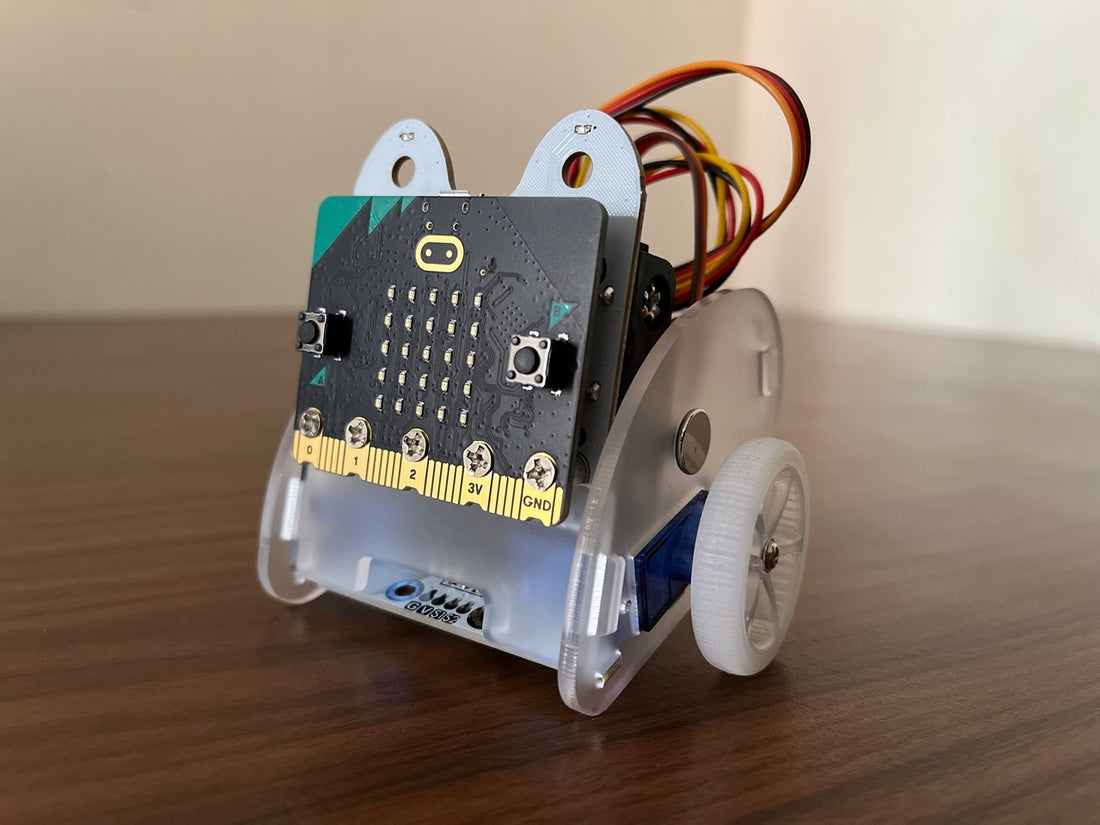
WHAT IS THE ELECFREAKS RING:BIT CAR?
The ELECFREAKS Ring:bit Car is a small DIY car driven by the BBC micro:bit. After building the car, you’ll be able to code its movement using the code editor on Microsoft MakeCode for micro:bit.
Fortunately for me, this meant that I could comfortably code the Ring:bit car with code blocks instead of having to learn JavaScript or Python (although these options are also available for advanced coders).
WHAT’S IN THE BOX?

The box is small – about the size of a palm. Inside, everything is nicely packed so that you don’t lose anything. The box also includes a mini screwdriver which means no need for searching around the house for one!
However, one thing to take note is that the micro:bit V2 as well as 3 X AAA batteries are NOT included. So you’ll need to get these separately.
ASSEMBLY
Building the Ring:bit car was a lot easier than I expected. All you have to do is follow the instructions on the manual (see below). The instructions are crystal clear and if you do get stuck, there are clear visuals to guide you too!
Side note: If your car isn’t moving, make sure that the ground wire (black or brown) is connected to the correct pin (see step 8 below).

PROJECT #1: MAKE A SHAPE
The first thing I tried was to have the car draw its own art. I didn’t believe that this tiny car would be able to draw shapes on its own but to my surprise, it did a fantastic job!
Of course, I needed to do my part of coding the right instructions onto the MakeCode editor too (see screenshot below).


PROJECT #2: CRAZY DANCE
After drawing shapes, I decided to make the Ring:bit car do a crazy dance. Essentially, you can code it to move randomly so that it starts to look as though the little car is jamming to its own funky groove. Click below to watch how it moves!
Here's the code to try it out at home!

PROJECT #3: POLICE CAR
Here's the code for this project if you're interested to try it yourself!

PROJECT #4: LIGHT FOLLOWING CAR
Of all the features of the Ring:bit car, I was most sceptical about its light following abilities. I had read that it can follow light without any additional extensions added. So to confirm this, I decided to try making a light following car.

As it turns out, the Ring:bit car was completely capable of following the light and it got even better when I switched off all the lights in the room.
VERDICT
I’d definitely say that overall I had lots of fun playing with this DIY smart car. Building it from start to finish allowed me to experience the joy of being an inventor (although all the instructions were already given to me).
Furthermore, I enjoyed going through the process of trial and error when I struggled to get the car to draw a circle and had to adjust the pen’s position multiple times.
Most importantly, getting a chance to code with simple blocks enabled me, a novice coder, to be introduced to the limitless possibilities of programming. I certainly am a lot more interested to learn about coding now that I have built a movable car all on my own!