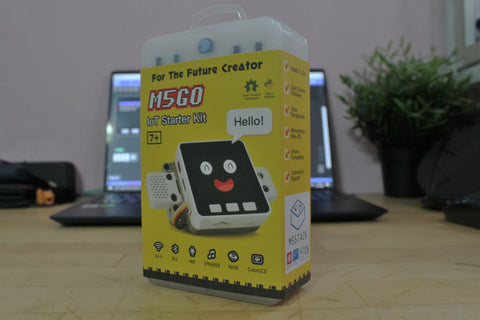
The Internet of Things (IoT) is a category of automation that has gained much popularity in recent times. But what exactly is IoT, and how can a beginner get into it? Amongst the many microcontrollers that are out there, the M5GO IoT Starter Kit is an excellent, feature-rich starting point for those looking to embark on the IoT journey! The M5GO IoT Starter Kit is marketed as a tool for STEM education, so let’s check out how this kit fares.
Intro
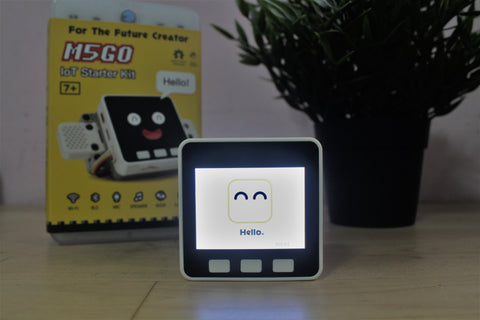
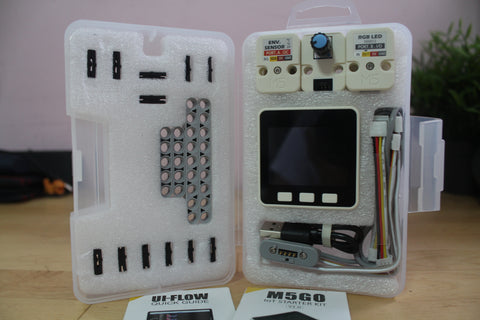
The starter kit comes with the M5GO Core and six commonly used units. The M5GO Core is the central microcontroller, and is equipped with a 2” colour LCD screen, 3 buttons, gyro and accelerometer (for tilt and shake inputs), a microphone, a speaker and 2 RGB light bars. On top of this, the M5GO Core is both Bluetooth and WiFi enabled - which means you can control the unit by sending it new apps to run or send data back to your computer in real-time, wirelessly.The M5GO Core also has 3 ports for more units to be connected - one for I2C, one for I/O and the last is for UART. You don’t need to know too much about the different ports and protocols though; the units are neatly labelled with which ports they are compatible with, making it easy even for younger innovators to get started on projects without too much hassle. The six units that come with the IoT Starter Kit are:
- Environment sensor - The ENV II sensor is able to capture the temperature, humidity and atmospheric pressure of its surroundings.
- Infrared Remote - The IR unit can be used to send an IR signal; a handy IR remote control unit.
- RGB LED - The LED unit has 3 separate LEDs that can be set to any colour, and also has an additional extension port to add on another unit.
- Passive Infrared Sensor - The PIR sensor unit can be used for detecting motion.
- Potentiometer - The ANGLE unit is a potentiometer that returns an output between 0 and 1023 depending on the angle that the knob is turned.
- Grove Hub - This is an extension unit to allow more sensors to be plugged into the same port (e.g. plug both the LED and ANGLE units to Port B through the Grove hub).
All of these are connected by the same 4 pin GROVE connector wires, of which there are 4 in the kit. This is in addition to the USB-A to USB-C cable for data transfer, and a USB-A magnetic charging base for the Core. Another neat feature is that the M5GO Core and extension units are LEGO-compatible! The kit comes with a handful of LEGO connectors that can be used to hold the extension units and the Core together, or even to connect it up with other LEGO structures.
With all the units and features between the M5GO Core and extension units, there is no shortage of possibilities. Many of the initial, simple IoT projects that you might envision can be brought to life with what is already present in the kit. For the creative, there are further units that can be obtained separately if you’ve exhausted your options with the existing units.
M5GO in practice
Even before getting into the nitty-gritty of setting up the M5GO, you can have a little fun with it! The Core comes preloaded with some simple applications and games that show off the functionality of the kit and the extensions. For new students, this will definitely serve to spark their interest, and broaden their minds as to the possibilities with the IoT kit.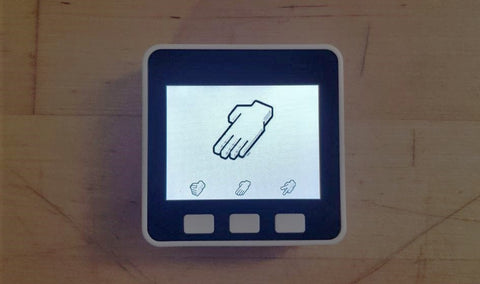
However, when I finally got down to setting up the M5GO Core, I faced a little difficulty. There were two little pamphlets inside the kit. One of the booklets showcased more in-depth specs of the components and had some quick start instructions, and the second booklet had instructions for setting up UI-Flow, which is the integrated development environment (IDE) made by M5Stack for the M5GO. Both had slightly differing instructions to do similar things, and this was made worse by the fact that the user interface and corresponding instructions given by both booklets was different from the interface on my M5GO Core! Some of the websites listed in the quick start guide don’t seem to exist anymore - looking at you, m5go.com and cloud.m5go.com!!


Two small (and confusing!) guides that come with the kit
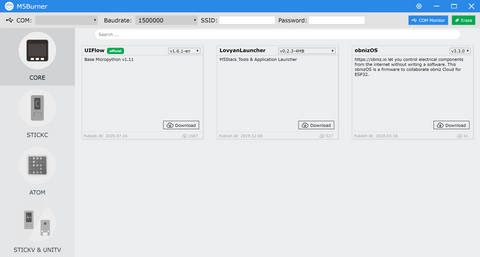
I made the mistake of fumbling around with the setup for a long time before turning to the documentation online. For new users, head to this link and go through the UI Flow setup instructions for a clear step-by-step guide on how to patch your M5GO and get started. The online docs were much more up-to-date and thorough in the set-up instructions, and helped me install all the necessary drivers and software smoothly. As it would seem, M5Stack is constantly working on and improving the software for the M5GO. The pamphlets were for one of the earliest versions, while my M5GO Core was on a version newer than the pamphlets (but not the latest release either). Yes, very confusing :(. After getting the M5Burner software and following the instructions to patch the M5GO, I also downloaded the desktop UI Flow IDE programme and finally got into coding.
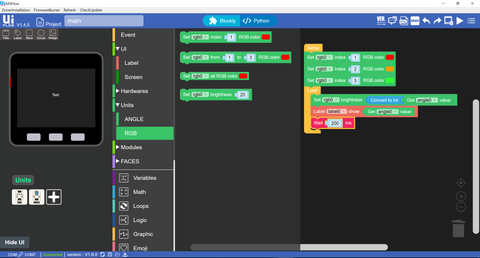
As stated by M5Stack, the M5GO Core can be programmed using the Arduino IDE or the UI Flow IDE. (If you’re using micropython, you can work with any editor of your choice before flashing to the Core.) The UI Flow IDE also supports micropython programming, but since that was pretty standard, I mostly stuck to testing the modified Blockly interface in UI Flow. Conveniently, the Blockly programming is constantly converted into micropython, so when you are ready to make the jump, it’ll be as easy as changing tabs in the software.
Pros and Cons
Immediately out the box, the M5GO is very exciting. To me, this is because of the LCD screen that comes built into the main unit. This is one of the big plus points of this kit, and in particular this micro-controller. Most other micro-controllers that I’ve experimented with (Arduino boards, micro:bit) do not come with an integrated LCD screen, and to connect and program screens on other boards is not something you can easily do. In today’s day and age where we are used to having some markers or immediate feedback from screens all around us, it felt like a shame that I had to work my way up before I could use a proper screen for my projects. This is absolutely not the case with the M5GO. The screen forms a big part of the Core, and the pre-loaded apps make full use of this feature. Surely, this will make it much more alluring to learners as well.Another huge plus for this kit is the well-integrated wireless support. Since the M5GO Core is powered by the ESP32 card, the integrated WiFi and Bluetooth capabilities are a key part of the Core. Compared to other micro-controllers, this is a great step up and Instead of having to keep the device connected to the computer for loading scripts and debugging, it is much easier to hook the device to your local network, and remotely push scripts.

One more point going for the M5GO is how fuss-free the connections are, and the general aesthetics of the product. A big part of micro-controllers also involves how the wiring is done to connect external i/o, and frankly it gets messy and confusing! All the criss-crossing wires hanging all over the place can be a headache, and having to do cable management or find a weak connection amidst jumper cables detracts from making and testing projects. With the M5GO, the mess is practically absent! The LEGO connectors make it easy to create simple structures holding the units and the Core together, and the Grove wire connectors are neatly bundled. The Core and the units have a clean, simple, blocky design that hides most of the complexities in a pleasant packaging. For educators, it makes it much easier to manage multiple components when teaching a class or large group.
I made a quick script that takes the ANGLE unit’s input to control the brightness of the LEDs, and held it all together neatly using the LEGO connectors from the kit! A clean look with minimal wires hanging about :)
However, as I detailed earlier, setting up the M5GO was a lot more troublesome than expected. Leading on from that, I think that the documentation for the M5GO still has some room for improvement. The direct translation from the original Chinese documentation has created some confusing gaps in the descriptions and instructions. For instance, for using internet mode to send scripts, you will have to use the “Beta” version of UI Flow’s web interface (as the stable 1.4.5 release is way behind the current 1.6.0/1.6.1 versions), and make sure that the UI Flow version matches your M5GO Core’s version as well. This was not really made clear from the documentation, and I had to figure it out myself.
In addition, I personally did not find the UI very intuitive. The M5Burner software would have been rather difficult to navigate without the documentation, and oftentimes when trying to use the Blockly interface, it took me a while to find the blocks I wanted (for instance, to make a permanent loop that runs once the device has started up, the “Loop” block is NOT found under the “Loops” section, but instead is under “Event”). Perhaps this is due to my being acclimated to the Microsoft MakeCode UI for micro:bit - but I imagine small hiccups like this can occur to anyone, particularly students who are new to programming. The inclusion of block-based programming is a great step for beginners, but the whole interface needs a little more refinement to be truly user-friendly and newbie-inclusive.
Conclusion
At the end of the day, I’m still very impressed by the M5GO. The process of programming and sending scripts to a micro-controller over WiFi made me feel that much closer to actually implementing a simple IoT project! I can easily hold the units together with LEGO connectors, and install the project at any location without the fuss of making a housing or having to keep it nearby (or worse, dismantle the setup) for testing.Due to the documentation and UI being a tad bit unfriendly in its current state, I think this kit is best suited to be picked up by individuals with some prior experience handling micro-controllers, or by educators who can guide their students through the steps. With someone to help them get over the initial setup phase, I believe the M5GO IoT Starter Kit can really shine in helping beginners easily put their ideas into motion with a device that is not only chock full of features, but also looks effortlessly good.