
Intro
Hey everyone! Recently I was asked to write a review for the Circuit Scribe Drone, and well, I thought it’d be interesting. After all, drones have been used for many cool stuff such as races and medical deliveries, so playing with one should be fun, riiiiiight?
First Impressions
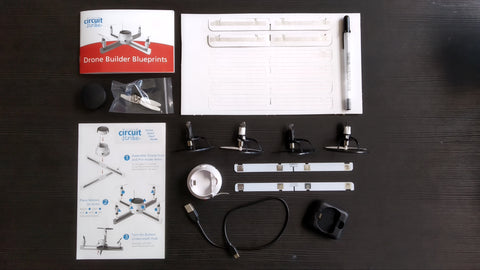
Opening the box, I meet with a series of drone parts and instruction manuals - certainly looks promising. However, it made me slightly concerned about the DIY aspect. How stable would a DIY drone be? But lo and behold! They provided a ready-made base for the drone, so I guess that’s a form of insurance. That aside, size-wise, I would say it is reasonable; the propellers seem quite small, but the arms are about the length of well… my human arm. The drone should turn out to be the size. They also provide a Circuit Scribe pen, so I assume that once you’re done with the drone, you can always reuse it for other projects. Anyway, time to start building!
Physical Assembly
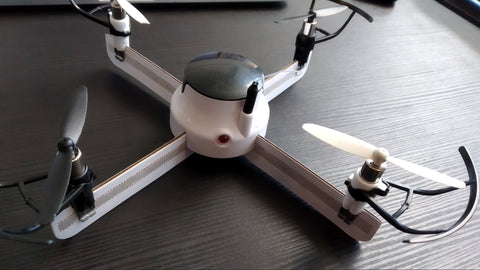
Instructions for physical assembly are detailed in the manual, so setting up the drone was in no way hard. Even if it goes wrong, the box contains five other arm sets, meaning you can always try again. However, what was hard was setting it upright. Since the arms are made out of cardboard, I have to say that they deform rather easily. This is especially the case when you’re trying to snap them out of the board. I guess one way to get around this is to use something sharp to poke out the small bits, instead of forcing them out. Also, be super gentle when slotting the arms together and into the drone; if you’re not careful, they will deform, and I guess that translates to less stability. Same goes for slotting the propellers. And another thing, I was wrong about the Circuit Scribe pen - there was only enough ink for me to make two arms (just enough for one drone). I admit it may have been because of me splurging on the ink, but I think that if you want all six sets of arms, you’ll probably need to get another pen.
Oh yeah, and I must say that it would definitely be advised to charge the battery the moment you open the box. I charged it via plugging in the USB cable, and it took a whopping 45 min on a PC plus an additional 10 min on a power outlet (I got a little tired of waiting, so I changed the method of charging). Hopefully, this means that the drone can run for a very long time.
Flight
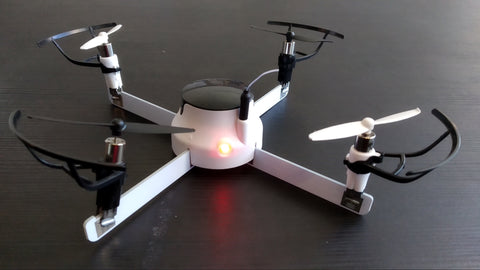
If I could sum up the drone flight in one word, it would be: Chaotic. The main issue would be the lack of stability, that is, when the drone first takes flight, instead of hovering in mid-air, it leans to one side and has a high tendency to crash.
In particular, with the DIY cardboard arms, the drone is barely able to hover, instead of falling to the ground despite me having pressed the take-off button. That being said, when I switched to the premade arms, it worked a lot better. The leaning problem was still there, though at the very least it could fly upwards.
Sadly, I was unable to try out the drone in an open space out of fear that it would crash into something.
Another issue would be the battery lifetime. The drone ran out of battery after 20 minutes of flight time, which I do not think is very long, especially compared to the charging time.
On the bright side, the app (CS Pilot) has a pretty nice and user-friendly interface, coupled with instructions from the manual. In addition, the Wi-Fi connection is speedy and not a nuisance. This means that if the above problems can somehow be solved, drone flight should be a simple task.
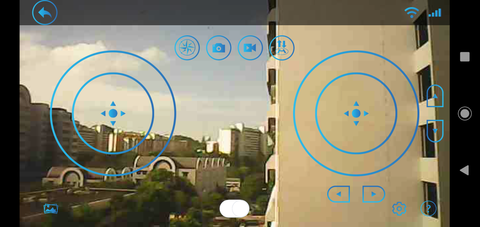
Furthermore, the controls are excellent; despite the leaning, the drone would still follow the controls as per the app, and that being said, with the premade arms, one can still fly it like a normal drone (albeit with lower accuracy).
Concluding Remarks
Overall, I am pretty satisfied with the Circuit Scribe Drone though it does have a few flaws. Nevertheless, if you’re looking for a simple, easy-to-build drone, and you want to fly it around somewhat accurately, I would recommend it for its price.
For anybody who tries this out, do take note of several things:
- Use the premade arms
- Charge the battery before you use the drone
- Fly it out in an open space to prevent crashing
- Switch it off to conserve the battery if you’re not flying it.
That’s all for now. Bye!