INTRODUCTION
Finally! No more troublesome alligator clips, unorganised wires and missing parts. Now kids can finally understand electronics, circuits and coding without going through boring lessons at school - all in the comfort of their home.
Education for electronics has indeed taken flight, especially more so with the Chibitronics "Love to Code" Creative Coding Kit. This kit makes you rethink your whole perspective on electronics as well as coding, seamlessly integrating the two into one. Previously one needed to watch long hours of tutorials on YouTube and borrow parts from school laboratories. Now with Chibitronics "Love to Code" Creative Coding Kit, kids can be introduced to the fascinating world of electronics, circuits as well as coding.
The "Love to Code" Creative Coding kit is suitable for ages 14 and above, or as a parent-child activity with a younger child. In this review, we'll explore the kit, how it works and hopefully get some insights on its usefulness as a STEM education product for kids.
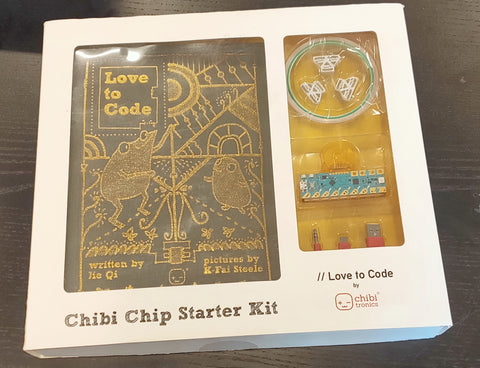
INSIDE THE BOX
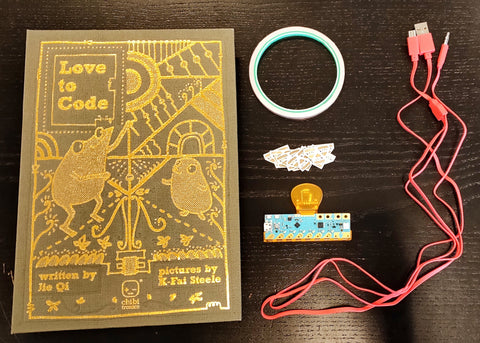
I open up the packaging, and I see a large "Love to Code" book, a micro-USB cable attached to a 3.5mm headphone jack wire, a Chibi microcontroller chip and some LED Light Stickers. Along with the stuff in the picture are some fabric tape patches and a circuit sticker stencil (not shown in photo). Very nicely packaged, and I like the illustrations on the cover of the book – I can see this being very attractive to kids.
A LOOK IN THE BOOK
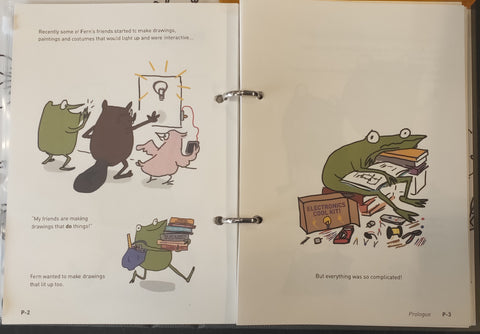
I take a peek into the book, and I'm greeted by tons of creative illustrations of characters. There's Fern the Frog who is on a journey to learn more about how his friends made interactive electronics and designs. And the friends help him along the way! What I like here is the amount of effort the creators have put into coming up with a cute storyline that kids can follow through with and enjoy. Take a look:


It makes me feel comfortable following the tutorials provided, and the good thing is that they don't overload the user with redundant information – just the key steps to follow in a fun and interactive manner.
My first project seems to be the simply lighting up of an LED. I attach the copper tape and LED stickers to the book as per the instructions…
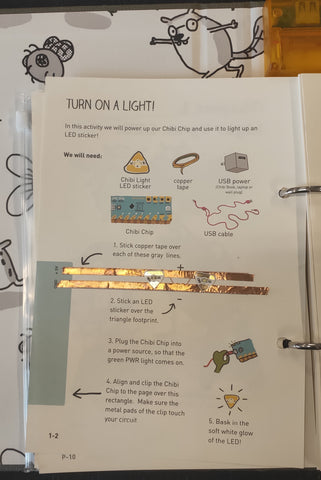
… clip the microcontroller on…
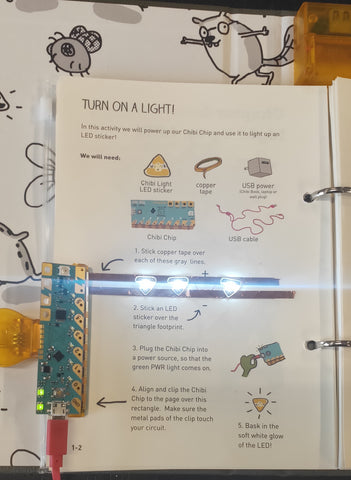
… and it lights up! It makes me want to continue reading to see what else the book offers. It looks like this type of instant gratification with electronics is sure to hook its readers to read on. Even for those not scientifically inclined, the book offers simplified explanations of why these circuits work and the science behind them in the pages after the circuit set-up.
The structure of each experiment goes like this:
Setting up the circuit
Writing the code (if any)
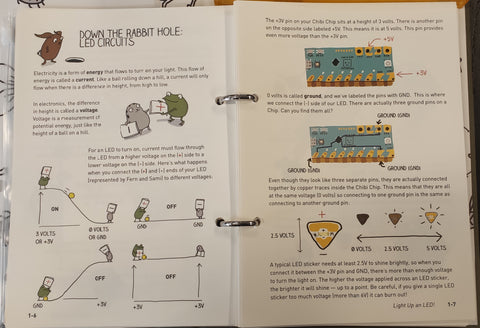
"Down the Rabbit Hole"
The "Down the Rabbit Hole" section offers a nice and easy-to-understand explanation of why everything works. They go into detail for every part of the circuit and every line of code, so that kids can learn as much as possible.
CODING
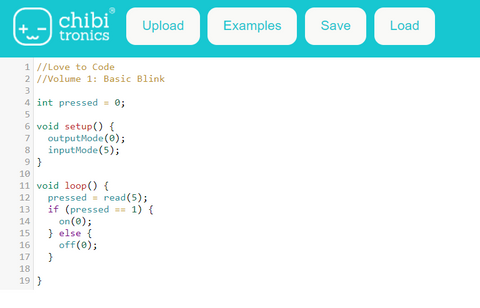
Chapter 2 introduces coding! Using the Chibitronics "Love to Code" editor, kids can not only program the lights to light up a certain way but can get familiar with the experience of coding as well as the logical thinking that goes behind coding. To get an LED to blink continuously, you would need to put pauses in between using the "pause" function, and not just turn it off and on. This gets the kids accustomed to a "step-by-step" approach, which is essential to anyone learning how to code for the first time.
A few pages more to Chapter 3 and I land on… switches! With a little bit of code,
and a little bit of circuit set-up,
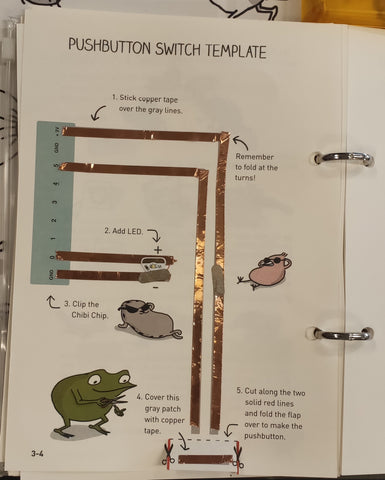
I managed to create a working switch circuit in less than 5 minutes. Take a look:

How? Again, it's because of the easy-to-understand guide that the book provides. What I found most innovative is that by combining both electronics and code, Chibitronics managed to teach concepts from both areas within this single lesson. Very impressive.
IS IT PERFECT?
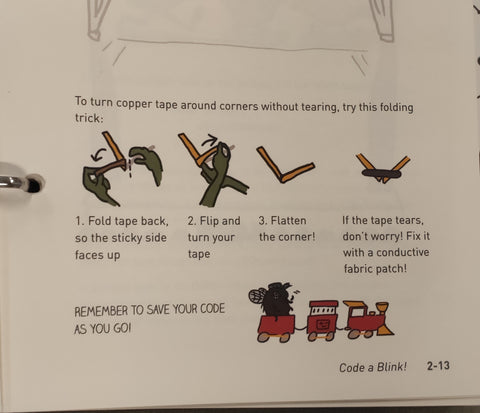
No, of course not. Like all products, the Chibitronics "Love to Code" kit has its flaws and inconveniences as well. For example, folding the copper tape to go continuously around a 90-degree turn can be challenging, and may require a lot of fabric tape patches at first:
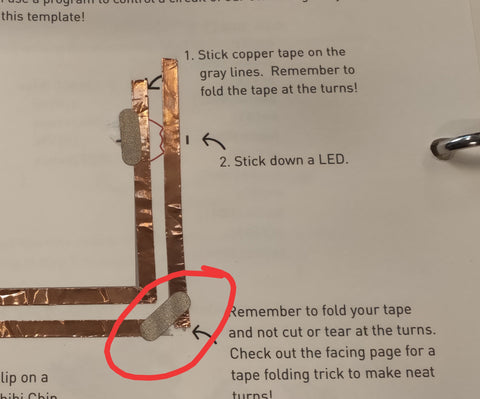
However, the book does provide a neat little trick on how to do this properly, though it takes time to master it…
Another bothersome aspect of this kit is that debugging takes a long time as well. What do I mean by this? Well, if there's anything wrong with the setup such that the LED doesn't light up or if something doesn't work, it's rather challenging to identify the problem straight away. One has to go through the process of "debugging" to fix the solution. For which an entire chapter of the book has dedicated to, but the book does help you find the problem and fix it, so it's still okay.
One other thing I didn't really like about the kit is that the copper tape can be easily torn. This is good in the sense that one doesn't need scissors to cut the tape. But the uneven tearing results in a rather weak connection, and I highly recommend that scissors be used instead. On top of that, the copper tape is a little flimsy and handling it takes a little bit of skill and mastery.
And throughout I kept forgetting to get the PROG light to always turn red before uploading the code! It doesn't work if you don't do that! As a result, I spent quite a bit of time "debugging" until I fixed the problem.
IS IT GOOD THOUGH?
Despite the flaws, I think the Chibitronics "Love to Code" kit does what it says it does: teaches kids about both electronics and hardware coding without all the boring tutorials in the middle, in an enjoyable manner as well. In my opinion, this is a great kit to get your kid exposed to the STEM (Science, Tech, Engineering & Math) fields, and is excellent for getting them started on electronics and technology, which may very well be their passion in the future.
The kit also encourages creative thinking and lets its users build whatever circuit they want on different pages, often allowing them to sketch a design around a circuit as well.
Here is the scene:

And here's the sketching area and the circuit setup on the next two pages:
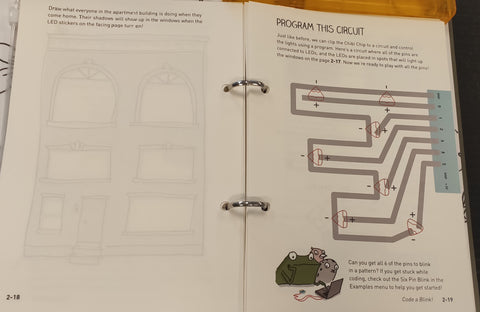
I find it very cool that kids can not only learn about circuits, but can get their hands dirty in actively trying to make the circuit work such that the shadows of their drawings can appear on the previous page.
IS IT WORTH IT?
The Chibitronics "Love to Code" Creative Coding Kit is a little pricey at S$125 (at the time of writing). But on the bright side, the kit will probably last your kid through the holidays. Instead of just watching YouTube videos all day, your kid could be engaged in something fun, rewarding and educational as well!