
First Impressions: Appearance and Hardware
- The sphero RVR has a nice blueprint-themed packaging, enticing for curious children
- Very clean and sophisticated look, the internal wirings are well concealed and looks to be pretty much weather-proof.
- As a tracked vehicle, RVR is able to manoeuvre over terrain that its spherical counterparts cannot, such as undulating slopes or outdoor dirt tracks.
- Comes with roll cage and mounting plate which are used for add-ons or if you just want to make RVR look fancier

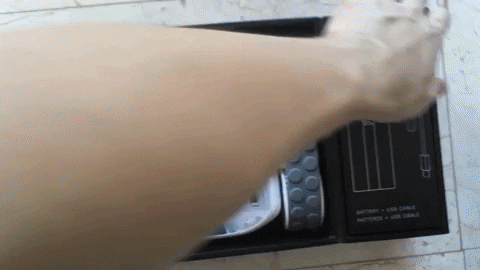
- 1 rechargeable battery and USB C cable
- There is a handy key used to access the battery slot

- RVR has 5 LEDs: Left/Right headlights, Left, Right, Back
Additionally, Sphero has the control groups of Main and Front. Main sets all LEDS at together and Front sets both headlights.
- The headlights look like squinting eyes which is a nice touch
- For info on the Sphero sensors: https://sphero.docsapp.io/docs/sensors
- It has all the usual sensors present in Sphero’s robots, like accelerometer, gyroscope which can provide information like speed, distance travelled and heading (direction that it’s facing in degrees!). This data is captured in the app itself and can be easily exported as a CSV file. (CSV files can be opened on any spreadsheet program, such as Microsoft Excel)
- The Colour sensor is unique to the RVR! Located on the underside (Circled below)

Sphero Edu App
The one-stop platform for learning the basics all of Sphero’s robots, as well as programming them. The app has a lot of free content in the form of sample activities, games and programs for the user to try out. These are not just provided by Sphero themselves, but also by the Sphero user community. At a quick glance these would be enough to keep anyone occupied for days. Although, the more complete packages for serious learners come in the form of paid structured lessons (CS foundations etc).
Overview on Programming with RVR
The Sphero Edu app has 3 different methods of “writing” programs as shown in the picture here

- Draw is for total beginners, allowing the user to literally draw a path in the app for RVR to follow.
- Blocks is for novices with some grasp of coding logic. It involves putting blocks of code together, much like making a jigsaw puzzle. micro:bit users would find this familiar. For this review we’ll be using these blocks.
- Text is for the more advanced users with knowledge of javascript (also allows more flexibility in coding where the blocks fail to fill in the gaps).
Sample projects/activities available on the app can be filtered for users of all the above 3 skill levels to explore.
Once inside a program, users can connect to RVR and move it around via joystick/keyboard without any code involved. All it takes is a Bluetooth connection and nimble fingers 😊
The Good: Drag and drop blocks are easy to implement, and by right-clicking/ long press for mobile app, users can access “block help” if unsure what a particular block does. The programs can be synced across devices and also downloadable.
The Bad: Inconvenient for users with small screens.
Movement Blocks
Being able to control RVR directly is cool, but every programmer needs their robot to follow set instructions! You can program RVR to roll, spin on the spot and more according to your own desired sequence. RVR can recognise heading in degrees, track the distance covered since the start of the program, and most surprisingly determine its location from the start in terms of x and y coordinates. Perfect for navigation games!
Sound blocks
There is also quite a diverse sound library to choose from ranging from very human expressions like laughing to scary music, mechanical effects etc.
Colour Blocks
As previously mentioned, what gives the RVR a 1 up over its counterparts is its colour sensor. The sensor returns RGB values which can be assigned to specific commands when RVR travels over chosen colours using the on-colour code block. In this video, a specific phrase is played in response to each different colour tile, showing that RVR can act based on different colour conditions.
The colour can be controlled more precisely using the colour channel blocks under the operators tab.
You can check out the code I used to make this simple program here: https://edu.sphero.com/remixes/7404644
Communications blocks
These are exclusively for the Sphero Bolt and RVR for interaction between robots! Check out this video for a sneak peek: https://youtu.be/D3RmXwsq9Ik?t=233
Points for improvement
Hardware:
- No in-built collision detector. Unlike the preceding SPRK and BOLT (spherical robots), RVR on its own isn’t programmable to react to impassable obstacles, and will throw an error. This is disappointing considering the RVR’s price tag and what an obvious feature this is. Not to mention that older models like Bolt have this function.
- No built-in speaker, sounds come from the phone/laptop which sent the program instead of RVR. This makes sense if RVR is being operated from a distance, but otherwise it diminishes the life-likeness of RVR that Sphero is trying to bring across in features like its communications functions where multiple robots can swarm together.
(The lack of collision detection and speaker can be overcome by building your own. Look at what this RVR user has done https://community.sphero.com/t/mini-diy-rvr-stereo-system/1143/4 (skip to Emerald_RVR’s post)
- The battery is proprietary, so I can’t just get it easily replaced at my local convenience store.
- The battery pack occasionally becomes unseated. To solve this, I stuck some blue tack on the inside of the battery compartment hatch.
- Location tracker is not very accurate, especially at high speeds/on uneven terrain. There’s more room for error, since RVR’s tracks wouldn’t be moving in a perfectly straight line.
- Input speed is based on a value from 0 to 255, not able to program in real units like m/s. This means time-consuming calibration is needed which can be annoying because trial and error is involved to get it to the desired value.
Sphero Edu App:
- Code blocks don’t have in-built else if statements, must do it like so:

- Unable to sign into Sphero Edu Desktop app using google account. No issue on the mobile version of the app, but I faced this problem because I wanted to run the program from my pc while taking videos of the RVR with my phone (cannot run the app in background otherwise RVR loses Bluetooth connection).
Concluding remarks
Right out of the box, RVR has quite a few in-built functions, most notably those related to colour. However, RVR on its own doesn’t go very far beyond navigation and data collection or flashing lights (all of which Sphero’s other robots like Bolt are also capable of). Users who intend to buy the RVR stand-alone will be disappointed. RVR is also bulkier and may not be the best choice for users who want a simple portable robot to bring around. In contrast, robots like the Sphero Mini are pocket sized and much more suitable for younger audiences.
In my opinion, RVR is for those who want to build and test their own gadgets on a mobile robotics platform that can be brought outdoors. The fact that RVR is a tracked vehicle with a max speed of 1.6 metres per second is an obvious sign. Sticking to a conventional classroom setting would be underutilising it. Apart from that, RVR is made to work with Raspberry Pi, micro:bit and Arduino, and users should experiment with things like wind sensors, robotic arms, and other 3D printed thingamajigs. Users who find themselves not ready to try these out should stick to more affordable options.
More advanced users who already have the RVR can head over to https://sdk.sphero.com/ to look at the documentation for the code behind Sphero, as well as browse through more advanced sample projects with add-ons! Speaking of add-ons, we’ll be looking at some of those in a subsequent review.
This review was written by Daniel Tang, currently studying Engineering Product Design, Computer Engineering Track at Singapore University of Technology and Design.