
Looking for something unbearably cute to decorate your belongings?
Intro
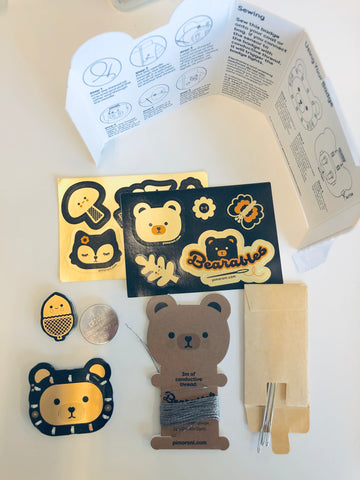
At first glance, you might think these woodland-themed, multi-coloured LED badges are just a cute wearable novelty item. Well, there is much more to them than merely aesthetic decorations. Not only can they be connected to and triggered by analogue sensors with conductive thread, but they are also designed to be hackable.My Bear Badge kit included:
- Bear badge with twelve LEDs (multi-coloured)
- Acorn motion sensor
- 3m stainless steel conductive thread
- Three sewing needles
- CR2032 3V coin cell battery
- Two sticker sheets
- Instructions
- Reusable box
At first glance, I was pleasantly surprised at how compact and adorably designed the packaging was.
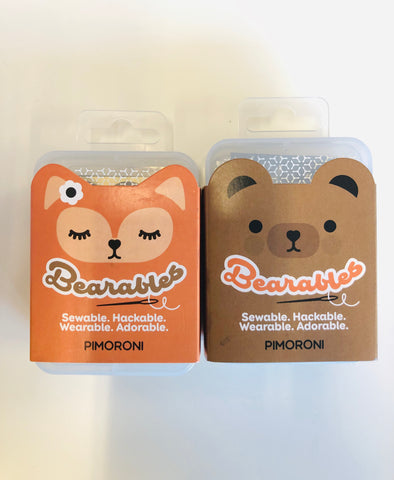
There are two different kits, one a fox theme and another a bear theme, each featuring a badge, sensor, a generous 3 metres of conductive thread, and sewing needles.
The only difference is that the Bear badge kit includes a motion sensor, while the Fox kit comes with a light sensor. Both badges and sensors have two metal hooks on the underside, around which you repeatedly loop the conductive metal thread to connect the circuit and sew them onto an item of clothing or a bag – you cannot put them in the wash though, as they don't like water. The instructions suggest sewing this onto something you don't wash very often or use metal poppers so you can remove it before washing.
The badge is powered by a CR2032 coin cell battery that provides three to four days of fully lit use. The LEDs can be controlled manually by a small button near the edge to switch between various light patterns on the twelve coloured LEDs (blue, green, yellow, orange, red, and pink). Holding the button down for a few seconds puts the badge to sleep or, if a sensor is connected, selects trigger mode – in which case, depending on the sensor type, either motion or a lack of light will then activate the badge LEDs.
"Hacking" the badge
With no visible connection ports, you may be wondering how you go about hacking the badge. The five tiny metal pads on the rear provide the means – via the I2C bus – to program the badge's PIC16F1503 chip using a suitable board, such as a Raspberry Pi or Micro:bit. To help us out, Pimoroni has created a Bearables Python library which lets you switch the LED pattern, control individual LEDs to code your patterns, use the button to trigger events, and read the voltage across the sewable hooks on the back of the badge.
The two sewable hooks can be used to read raw ADC (analogue to digital converter) values (0–255) from pretty much any analogue sensor so that you could attach different ones such as a sound sensor. You could also use the hooks to read pins that are pulled high or low on attached microprocessors, opening up all sorts of possibilities for using external data sources to trigger badge patterns.To install the Bearables library, open a terminal window, and type the following:
|
git clone https://github.com/sandyjmacdonald/bearables.git cd bearables/library sudo python3 setup.py install |
Note that the installation requires the smbus library.
The set_pattern() function allows you to select one of the 12 preset patterns on the badge, numbered from 0 to 11.
|
import time from bearables import set_pattern while True: for i in range(12): set_pattern(i) time.sleep(5) |
Button Press
Button press events can be linked to functions using the @on_press decorator. The function to which the decorator is attached will fire every time the button is pressed. Here is an example that turns all of the LEDs on for two seconds when the button is pressed:
| import time from bearables import set_all, show, clear, on_press @on_press def handle_press(self): set_all(1.0) show() print("Button pressed!!") time.sleep(2) clear() show() while True: pass |
Assembling the kit
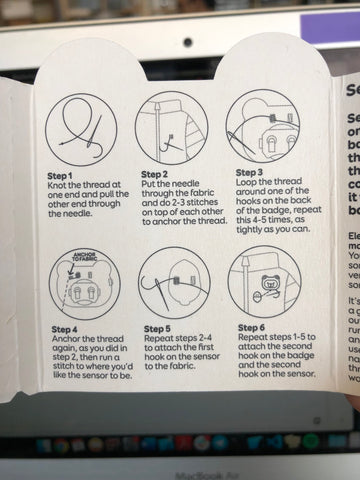
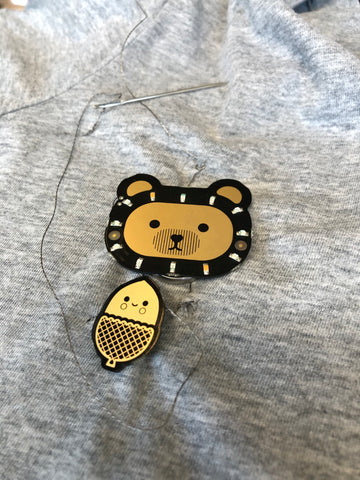
I decided to use an old shirt to sew on the badge and sensor. Having minimal experience with sewing, I initially faced a little difficulty getting started. However, the manual was clear and guided me with step-by-step pictorial instructions. The nifty design of the badges and sensors made it simple to connect them. It does not matter which way round they are connected - connect one hook on the badge to one hook on the sensor with conductive thread, then do the same with the other two hooks.
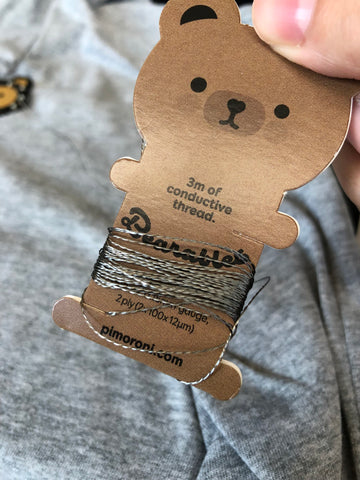
I was amazed that the conductive thread felt as soft and flexible as regular sewing thread! I found the little card bobbin that the thread was wrapped around to be especially endearing.
While it is stated that this kit targets at children and teenagers of ages eight and above, it seemed unlikely that young children would be sufficiently adept at sewing to be able to assemble this kit without encountering any difficulty. However, I do admit this is a great way to get children interested in programming. The aesthetically pleasing design of the package appeals to children and teenagers alike, making it a useful tool for introducing children to technology and programming. I strongly recommend a parent or guardian be present to help out younger children, due to the possible dangers associated with sewing needles and sharp conductive threads.
The Final Product
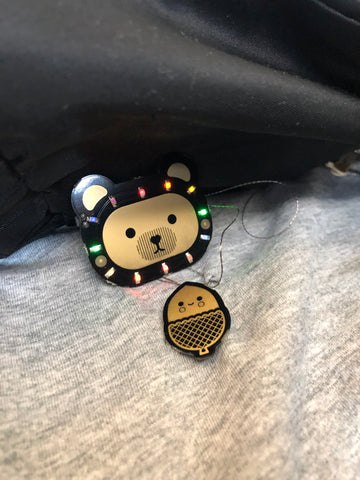
After I finally stitched everything together, I tested out the motion sensor. I first put the badge to sleep, then tilted the little acorn motion sensor.
The badge lit up! Mission accomplished. The LEDs are not super bright in daylight, so I recommend trying this against a dark backdrop or in a dimly-lit room.
Things to note:
- The Bearables badges and sensors are not waterproof or washable
- Be aware that conductive thread is sharp!
- A dab of clear nail varnish on the conductive thread around the hook can help to give a better, more reliable connection
- Badge dimensions: 41 x 35 x 5 mm (LxWxH)
- Sensor dimensions: 25 x 18 x 4 mm (LxWxH)
- Ensure that the two pieces of conductive thread connecting your Bearables badge and sensor do not touch, bearing (pun intended) in mind that they may touch when the fabric is creased or folded. Nothing bad will happen; the sensor won't work as it should.
- The hooks on the back can be shorted without any damage to the badge, although it may trigger the LEDs similar to triggering them with a sensor. A painted or coated safety pin will work better than a bare metal one.
Verdict
Overall, I would say that the Bearables kit is a great purchase and fun project for anyone attracted by its lovable and charming design. There is indeed a slightly challenging educational aspect to it should you decide to "hack" the badge, that gives a creative element to it. For its price point, I would agree that given the number of components in this kit and the designing that went into it, it is excellent value for money. I would purchase it to try it out, but its lack of functionality is something to take note. I strongly recommend parents to consider giving this as a gift to their young children to get them interested in programming and technology.
This post was written by our intern, Rebecca, who just graduated from junior college.