
You’re in the office. Sipping coffee, crunching numbers. Your boss hands you a micro:bit Ring:bit Car kit, and asks you to do a review. What do you do?
(I am a full-time staff, after all, I’ll try to keep it as unbiased as possible.
Intro
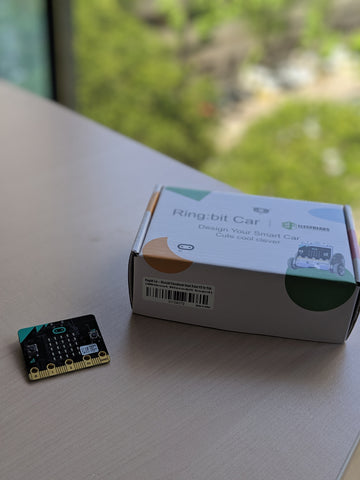
First and foremost, you’ll need a micro:bit to play with your Ring:bit Car kit, unless you just want the car shell and/or want to cannibalize the parts for your own projects. The micro:bit is a microcontroller (think Raspberry Pi, but much, much simpler) designed by the BBC for use in computer education. It has been steadily making its way into the hands of most of the younger generation, as the Infocomm Media Development Authority (IMDA) has been working with the Ministry of Education to introduce the micro:bit to the younger generation as part of the Digital Maker Programme. If you’re new to all these, here’s a slightly outdated summary from the Straits Times. I’m sure you can find more information on your own. Moving on! If you have a micro:bit, you’ll need a laptop to code your micro:bit. You can use a tablet or a phone to code your micro:bit, but hey. It’s the 21st century. I’m sure you have a laptop that can load a browser. Well, I have my micro:bit, the Ring:bit Car kit, and my trusty MacBook. Let’s get to it!
First Impressions
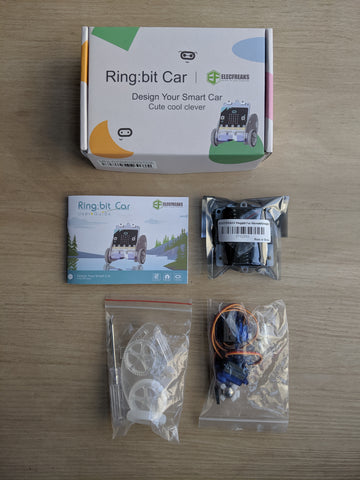
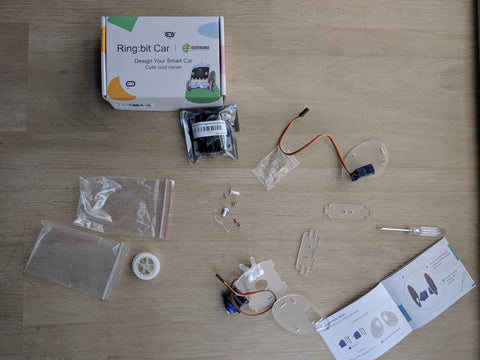
First things first. The packaging for the kit is small, about the size of your hand? If you’re looking to build something larger than the palm of your hand, you’ll have to look for something else. It does have the finished Ring:bit Car on the corner of the packaging, so at least you have a feel of what you’re about to assemble. Opening up the box reveals an instruction booklet, a Ring:bit breakout board, plastic wheels, a small screwdriver, acrylic chassis, servo motors and tiny rivets and screws. The Ring:bit breakout board is the reason why this kit is called the Ring:bit Car Kit, as the car is centred around this item. I’ll give the company, Elecfreaks, props for including the small screwdriver, as I don’t actually have one at home and I would have had to struggle with using rulers/penknives/5-cent coins as a makeshift screwdriver.
Physical Assembly
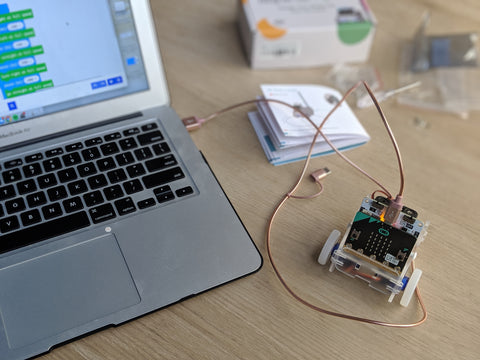
Assembling is straightforward, thanks to the simple, illustrated step by step instructions found in the booklet. I did struggle at first with the acrylic chassis, as the booklet mentioned to remove the film pastes supposedly found on the acrylic components. I spent a few moments chipping away at the corners of my acrylic components before giving up and asking someone to double-check that, yes, there was no film pastes on the acrylic chassis. I’m also not sure as to whether there is a front or back for the acrylic. Considering that the booklet does mention how to orient the pieces using the frosted side of the acrylic pieces, I’m going to have to assume that there’s no difference and that it doesn’t matter. Hopefully, that doesn’t impede my quest to assemble the Ring:bit Car. I also got into a bit of trouble when I tried to screw the servos onto the sides of the car, but that’s just due to my fat fingers. Damn fiddly tiny screws! The rest of the steps are quite easy to understand, and the chassis snap together easily. Impressive. I am a bit disappointed that it does take near the end of the physical assembling of the Ring:bit car for the booklet to inform me that the kit does not contain batteries and to “prepare it ahead”. Luckily for me, I can raid my office supplies for the 3 triple-A batteries needed to power the micro:bit. It’s also at this point that I realize the rivets can be pushed all the way in so that the universal wheel can be secured to the baseboard of the Ring:bit Car. Doh. The Ring:bit fits snugly into the car, so that’s great as well. I’m pleasantly surprised that everything is snug and fits well.
MakeCode Assembly
I started with assembling the car first because coding terrifies me. But you can do the reverse and start with the coding part first. The micro:bit has a USB micro-B port to import code. I am, after all, a modern woman, and do not possess any gadgets that powers from a USB micro-B cable. Again, I raid my office supplies for a USB micro-B cable. You do want to make sure that the cable is for data transferring, as some charging cables don’t support data transfer. You’ll know your cable works if your micro:bit lights up when you connect it to your laptop. Your laptop should also add a MICROBIT drive into your file manager.
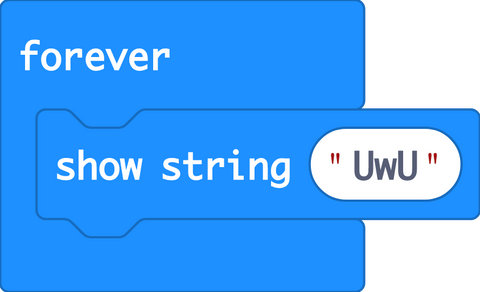
The micro:bit can be coded using Blocks, Javascript, as well as Python. I am familiar with none of this, but thankfully the instruction booklet has a section to teach you how to code your Ring:bit Car. Phew! I’ll be using the Microsoft MakeCode for micro:bit to code my Ring:bit car, but you can code it with the other abovementioned languages. The MakeCode editor is a web-based code editor, but it uses blocks to simplify the process. Instead of typing your code out, you can drag and drop the blocks of code. The feature that impresses me about MakeCode is that you can switch between block coding and Javascript, so that you can see your blocks of coding become actual lines of code!
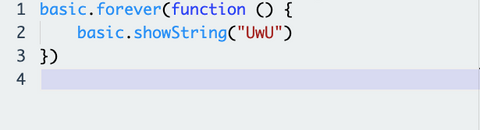
Instructions for coding are quite easy to follow, as they provide screenshots of what your screen should look like. You just have to make sure that the code on your laptop screen looks exactly like the code printed in the instruction booklet. Quite simple. I’m sure if you want to challenge yourself, you can go ahead and code your Ring:bit Car to move in other funky ways, but that’s not my cup of tea. The instruction booklet also explains what each block means, which is really helpful for newbie coders like me. Once you’re done with your code, download it and move it to the MICROBIT drive and the micro:bit will receive the code. Do remember to put in the batteries as your laptop will not be enough to power the Ring:bit car, and you’ll end up thinking that your Ring:bit Car is damaged. I coded my Ring:bit Car to move forward, without any gimmicks, and it did. Voila! I have brought my Ring:bit car to life! There’s a certain sense of satisfaction seeing the Ring:bit car executing your code correctly.
The booklet also has other codes for people who want to try something a little more in-depth, like adding a pencil to the back of your Ring:bit Car and coding it to draw for you. There’s also a tutorial on how to turn your Ring:bit Car into a remote-controlled car, using an additional micro:bit as the controller.
Final Thoughts
I will say that it was quite an enjoyable project and that there’s so much you can do to improve your Ring:bit Car. I can see myself coming back to the car to bling it up with decorations, as well as try my hand at making the car do more complicated things. The makers of the Ring:bit Car, Elecfreaks, sells other micro:bit compatible components that I can add onto the Ring:bit Car. What if I add on a sensor that can detect objects in front of it? And then I can code it to stop moving so that it can avoid collisions? What if I can add a buzzer so that it can make a noise when it’s stuck while traversing the vast expanse of my room? So many possibilities... So little time...
5/7, would come back to this kit again.